This time we’re diving into the exhilarating world of artificial intelligence and the tantalizing prospect of monetizing our own virtual assistants powered by ChatGPT.
Imagine, for a moment, that you have your very own AI bot, designed and developed to your specifications. A bot that works relentlessly, tirelessly, 24/7, to not only free up your valuable time but also put money in your pocket. Sound too good to be true? I assure you, it’s very much within your grasp.
The revolutionary world of AI and chatbots holds a treasure trove of opportunities waiting to be unearthed. For those of you hungry for financial freedom, yearning for a quick, yet meaningful solution to your monetary challenges, this is your moment. Your golden ticket. Your path to redefining your life on your own terms.
The beauty of it is, you’re not starting from scratch. Many of you are already acquainted with the basics of ChatGPT. But today, we’re going a step further, pushing boundaries, and exploring new territories. We’re not just tinkering with technology; we’re harnessing it to create something that can fuel our aspirations and elevate our lifestyles.
My goal, as always, is to provide you with clear, actionable insights to help transform this compelling vision into reality. We’re going to break down the process, cut through the jargon, and lay out a step-by-step guide to building and monetizing your ChatGPT-powered virtual assistant. We’ll demystify complexities, inspire new ideas, and uncover strategies to help you carve out your niche in the AI market.
It’s time to build, learn, and most importantly, prosper.
Step 1: Identify Your Niche
As you already know, the market is buzzing with opportunities, but choosing your niche can often seem daunting. That’s where your passions and interests come into play. What tasks could you automate that align with your expertise?
Maybe it’s an AI assistant for online fitness coaching, a chatbot providing mental health support, or a virtual tutor specializing in a specific subject. The possibilities are endless.
Try prompts like these to get some help from ChatGPT in finding an idea:
“ChatGPT, I’m interested in fitness, mental health, and education. Can you help me identify some potential niches for a chatbot within these areas?”
“I am passionate about cooking and would like to create a bot around this. Can you suggest unique niches within the cooking domain that might benefit from an AI chatbot?”
“ChatGPT, could you help me brainstorm potential niches for a chatbot that could be useful in the corporate sector?”
Step 2: Plan Your Bot’s Functionality

Now that you have a niche, it’s time to decide what your chatbot will do. The more specific you can be, the better. For example, if you’re creating a fitness coach bot, should it create personalized workout plans, provide diet advice, or both?
This step is all about understanding your audience’s pain points and tailoring your bot’s functionalities to address them.
Try prompts like these to get some help from ChatGPT to outline your bot’s functionality:
“I’ve decided to create a fitness coaching bot. What kind of functionalities could make it valuable to users? What features should I consider including?”
“I’m working on a mental health support chatbot. Could you help me outline some potential features that could help it stand out and provide value?”
“I want to build a language learning bot. Can you suggest functionalities it could have that would cater to beginner, intermediate, and advanced language learners?”
Action Point 1: Define User Interaction
How do you want users to interact with your bot? If it’s a language learning bot, do you want it to have dialogues with users, correct their grammar, provide word translations, or offer cultural insights?
Your bot should be user-friendly, intuitive, and conversational. It’s here that you need to create the framework for how a typical conversation with your bot will flow. This can be a flowchart, a storyboard, or simply a bullet-pointed list. Remember, user experience is key.
“ChatGPT, can you help me outline a typical interaction with a language learning bot?”
Action Point 2: Establish the Tone
Next, think about your bot’s tone. This should align with your audience’s expectations. If it’s a mental health support bot, the tone should be empathetic and supportive. If it’s a fitness coach bot, perhaps a more motivational and energetic tone would be fitting.
“ChatGPT, could you provide examples of how a motivational and energetic tone might sound in a fitness coaching bot?”
Ok? Let’s move on to getting your bot online.
Step 3: Leverage ChatGPT and No-Code Platforms

To develop your chatbot, you don’t need to be a coding wizard. No-code platforms such as Bubble or Adalo, combined with the prowess of ChatGPT, make the task more manageable than ever. These platforms allow you to integrate ChatGPT’s API, enabling your app to use the model’s conversational abilities.
Choosing a no-code platform
Here are a few standout no-code platforms that you can use to build a state-of-the-art virtual assistant.
1. Tars: Tars is a no-code platform that allows you to create conversational landing pages and chatbots. With its drag-and-drop interface, you can easily create bots that can engage with users, qualify leads, and book meetings. Tars integrates with various CRM systems, making it a versatile tool for businesses.
2. Botsify: Botsify is another excellent no-code platform for building AI chatbots. It supports integrations with numerous platforms, including Facebook Messenger and WordPress. Botsify also has unique features like a conversational forms tool that turns traditional forms into engaging chat conversations.
3. Landbot: Landbot offers a no-code solution for creating engaging chatbots. Its intuitive interface allows you to build bots that can handle complex tasks, including lead qualification, customer support, and e-commerce sales. Landbot also integrates with popular tools like Slack and MailChimp, making it an excellent choice for businesses.
Getting Access to OpenAI’s ChatGPT
Alright, now that we’ve explored some no-code platforms, let’s get into the meat of the matter – accessing OpenAI’s ChatGPT. This is the engine that’s going to power your app, the AI that will be having those engaging conversations with your users.
The first step in this journey is to sign up for OpenAI’s ChatGPT API. You can do this directly on OpenAI’s website. Here’s a step-by-step guide:
- Head over to the OpenAI website.
- Navigate to the “APIs” section.
- Follow the instructions to sign up for the ChatGPT API.
You will get your secure ChatGPT API Key: This key acts as a unique identifier that opens up the gateway for your app to interact with ChatGPT. Keep this key safe and secure; it’s as important as the secret ingredient to your favorite dish.
Pretty straightforward, right? But hold on, before you rush off to sign up, let’s talk about the API usage and pricing details.
OpenAI offers a variety of pricing tiers for their ChatGPT API. The cost depends on the number of tokens (the chunks of text that ChatGPT reads and writes) you process. As of 2023, here’s a snapshot of their pricing structure:
GPT-4
| Model | Input | Output |
| 8K context | $0.03 / 1K tokens | $0.06 / 1K tokens |
| 32K context | $0.06 / 1K tokens | $0.12 / 1K tokens |
GPT-3
| Model | Input | Output |
| 4K context | $0.0015 / 1K tokens | $0.002 / 1K tokens |
| 16K context | $0.003 / 1K tokens | $0.004 / 1K tokens |
You’re now armed with the knowledge to access the power of ChatGPT. Next up, we’ll dive into how to integrate this into your no-code platform of choice.
Integrating ChatGPT API with the No-Code Platform
Let’s break this down into manageable, digestible steps
For this example, let’s use Bubble. Most of the other platforms will work in the same way.
1. Navigating the Platform: Upon logging into Bubble, you’ll be greeted by a dashboard. Here, create a new project, give it a suitable name, and you’ll be directed to your workspace – the canvas where your dreams take shape.
2. API Integration: Now comes the crucial part. Navigate to the ‘Plugins’ tab and click on ‘Add plugins’. Search for ‘API Connector’ and add it. Within the API Connector, you’ll create a new API call. Name it ‘ChatGPT’, and in the API base URL field, add the ChatGPT API URL, which you can find in your OpenAI dashboard. Choose ‘POST’ as the method.
3. Inserting Your ChatGPT API Key: Here’s where your secured API key enters the picture. In the Headers section of the API Connector, insert ‘Authorization’ as the Key, and ‘Bearer ‘ followed by your API key as the value. This connects your Bubble app to the ChatGPT service.
4. Testing the API: The next step is to verify if the API is working as expected. Within the API Connector, you have the option to initialize the call. If the setup is correct, you’ll get a successful response, indicating your app can now communicate with ChatGPT.
5. Utilizing the API in Your App: Now that your app is successfully integrated with ChatGPT, you can utilize the API call in your workflows. For instance, if you’re creating a chat app, your workflow will trigger the API call each time the user sends a message, and the response will be displayed as ChatGPT’s reply.
Step 4: Crafting a Chatbot Prototype with a No-Code Platform
Let’s use the Landbot platform (from our examples above). Here’s how you can get going.
Action Point 1: Choose Your Template
Landbot provides a range of templates to get you started quickly. Depending on your niche, you can choose the one that best suits your needs. For instance, if you’re creating a bot to provide mental health support, you might want to start with a ‘Customer Support’ template.
“ChatGPT, can you help me decide which Landbot template might be best for a mental health support bot?”
Action Point 2: Customize Your Chatbot
This is the exciting part! You’ll want to customize your bot according to the conversation flow you designed earlier. Use Landbot’s intuitive interface to add, remove or alter elements to your chat flow.
“ChatGPT, could you help me understand how to customize the conversation flow in my Landbot template?”
Action Point 3: Add Functionality
Remember the functionality you planned earlier? Now’s the time to implement it. Whether you want your bot to schedule appointments, direct users to resources, or answer FAQs, Landbot has a host of features you can integrate.
“ChatGPT, could you guide me on how to add the feature of scheduling appointments in my Landbot chatbot?”
Action Point 4: Test and Adjust
Finally, test your bot using Landbot’s ‘Test Your Bot’ feature. This will help you identify any issues and make necessary adjustments. Remember, refining your bot is a process of trial and error, and the first version is rarely the final one. Embrace the process of testing and tweaking, knowing that each iteration brings you closer to your dream bot.
“ChatGPT, could you help me create a checklist for testing my chatbot prototype?”
In essence, crafting a prototype with a no-code platform like Landbot is an exercise in creativity and logic. It’s an opportunity to turn your passion into a tool that provides value for others while moving you closer to financial freedom.
So don’t hesitate. Dive in, create, iterate, and watch as your idea blossoms into a digital helper ready to change lives and secure your financial future.
You may also like 📖
- AI for Artists: How to Use ChatGPT to Write Songs and Monetize Your Music
- Earn with ChatGPT-Generated Fiction on Kindle Direct Publishing
- ChatGPT: Your Secret Weapon for Winning Writing Contests and Landing Lucrative Prizes
- ChatGPT for Real Estate: How to Write Property Descriptions that Sell and Make Big Bucks
- How to Use ChatGPT to Start a Profitable Review Blog
- Navigating Market Saturation: A Guide for Aspiring Online Entrepreneurs
How to use ChatGPT to 10x your Instagram account in 7 steps
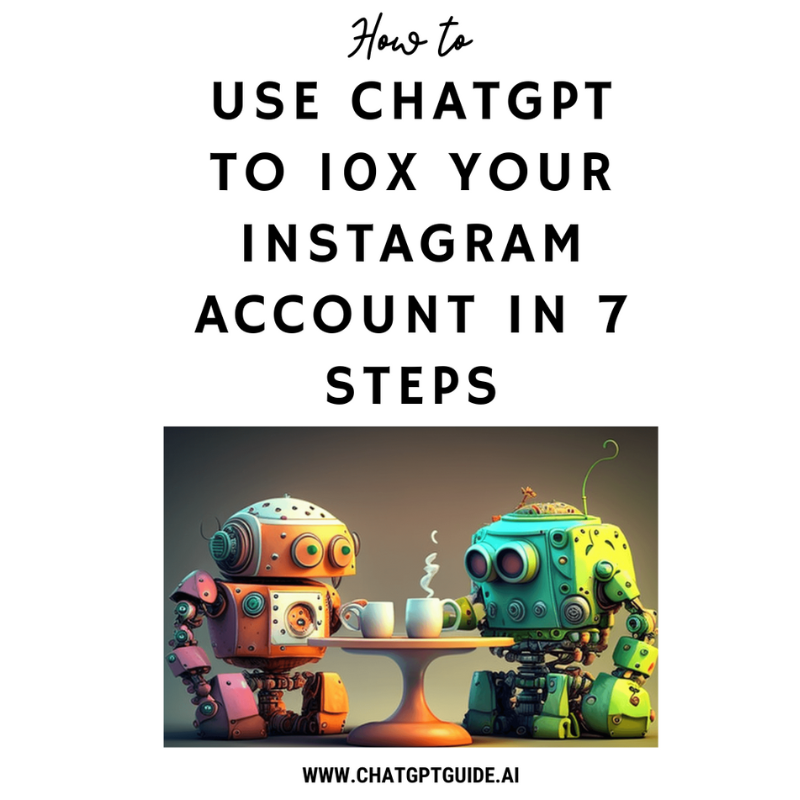
We teach you how to build your own super-useful prompts
View our Ebook, with a step-by-step
walkthrough to conquer Instagram using ChatGPT even if you are not tech-savvy
Monetizing Your ChatGPT-Powered Chatbot
Once you’ve built your chatbot, it’s time to think about monetization. Here are a few strategies:
1. Subscription Services: You can offer your chatbot as a subscription service, charging customers a monthly fee for access. This model provides a steady stream of revenue and works well for chatbots that offer ongoing value, such as those used for coaching or customer support.
2. Pay-Per-Use: Another option is to charge customers each time they use your chatbot. This model works well for chatbots that provide specific services, such as legal advice or medical consultation.
3. Sponsorship: If your chatbot attracts a large user base, you might consider seeking sponsorship from relevant businesses. In exchange for a fee, these sponsors can advertise their products or services through your chatbot.
Remember, the key to successful monetization is to create a chatbot that provides real value to its users. If your chatbot can solve a problem, entertain, or make life easier for its users, they will be more than willing to pay for it.
“Remember — it’s not about being a coding wizard. It’s about solving problems and providing value. That’s how you win.”
You may also like 📖
- Ultimate Guide: using ChatGPT to Plan your next Trip
- Unleashing the power of ChatGPT to master Chess
- How to use ChatGPT to reply to emails in your 9-5 job like a pro
- Writing the Perfect Cold Email with ChatGPT: A Modern Spin on the AIDA Model
- How to use ChatGPT to get unique Gift Ideas for friends
- How to use ChatGPT to Plan the Perfect Kids Birthday Party
- How to use ChatGPT to create custom Meal Plans that work
- How ChatGPT can help you Memorize Anything quickly
- How ChatGPT can help you Write your Fiction novel 10x faster
- How to use ChatGPT to Summarize Books
Conclusion and final thoughts
We’ve ventured through a compelling journey that weaves together your passion for technology and the hunger for financial freedom. As we step away from the constraints of our current job dissatisfaction and look to the horizon of possibilities that a ChatGPT-powered chatbot presents, it’s evident that the promise of a better future lies within your grasp.
Remember, your chatbot is a reflection of your aspirations, your creativity, and your commitment to making a difference. It’s more than a tool; it’s your digital ambassador, a tireless worker that embodies your quest for a life of luxury, meaningful family time, and the relief from the psychological burden of financial instability.
We’ve learned together how to identify your niche, plan your bot’s functionality, design and build your bot, and craft a chatbot prototype using no-code platforms like Landbot. You’re armed with actionable insights, detailed steps, and the power of AI, all of which converge to create your personalized gateway to financial freedom.
It’s true, the journey may be intimidating, and yes, you may falter at times. After all, we’re innovating on the bleeding edge of technology. But remember that each challenge is a stepping stone to mastery. Ask for guidance, leverage ChatGPT, seek advice, iterate, and keep pushing forward. The beauty of this journey lies in its flexibility and adaptability, mirroring the AI you’re harnessing.
So, as we reach the end of this particular conversation, understand that it’s merely the beginning of your extraordinary journey. Harness the power of ChatGPT, embrace the world of chatbots, and craft your route to financial freedom. This isn’t a quick fix; it’s a sustainable, fulfilling solution. It’s a chance to turn your restless energy into a thriving, automated business that aligns with your passions.
So, step into the realm of chatbots, where passion meets technology, and dreams meet reality. In the intersection of these worlds, may you find a fulfilling, profitable life, powered by your very own chatbot. This is your journey to financial freedom. This is your time to shine!


