Your cart is currently empty!
Step-by-Step Guide to Accessing and Using Plugins with ChatGPT
Author:
Published:
Updated:

ChatGPT, developed by OpenAI, is a powerful AI tool that can aid in a wide variety of tasks. One of the key features of ChatGPT is its plugin system, which allows users to enhance the functionality of the AI.
In this guide, we’ll walk you through the steps on how to access and use these plugins.
Step 1: Accessing ChatGPT
The first step to using plugins with ChatGPT is to access the ChatGPT tool. You can do this by going to the OpenAI website and navigating to the ChatGPT page (https://chat.openai.com). NB: You need to have the paid version of ChatGPT to use plugins.

Step 2: Activating the plugins
Once you’re in the ChatGPT interface, Click on the three dots on the bottom left corner and then select settings from the menu.

Then click Beta Features (left-hand side menu), and toggle on the Plugins:

Step 3: Navigating to the Plugin Section
Once you’ve activated the plugins, you will see the option for ‘Plugins’ located under the GPT-4 menu. By default these will be empty until you select the ones you want added. Go ahead and click on the Plugin store option.

Become a Superhuman at Work with ChatGPT

Achieve more with less effort
Transform your workday by achieving more with less effort. 60 use case walkthroughs designed to help you finish work fast and get you to the people you love faster
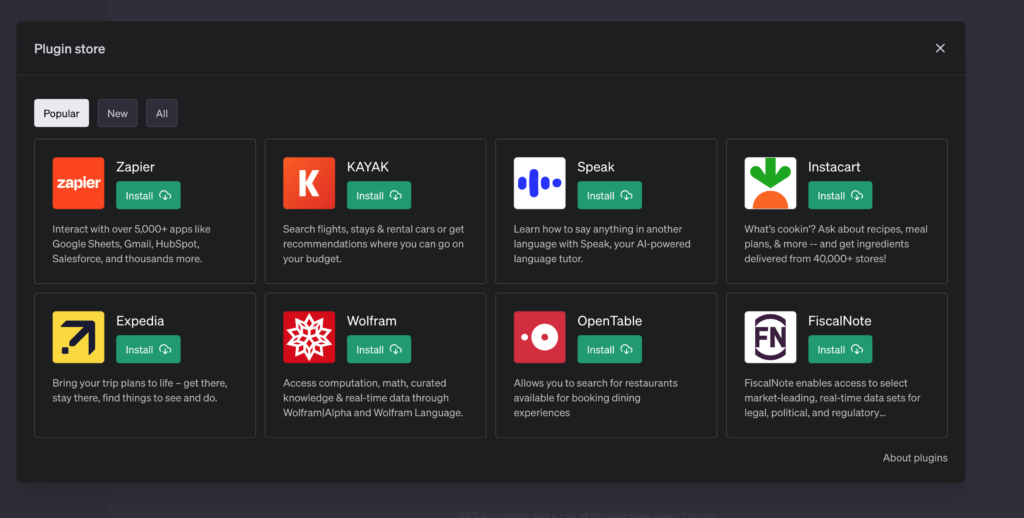
Step 4: Selecting a Plugin
You will now see a list of available plugins. Scroll through the list until you find the one. Click on it to select it, you’ll see a button that says ‘Activate’ or ‘Add’. Click on this button to add the plugin to your ChatGPT interface.
Repeat the above steps until you have all the plugins you want activated.
Step 5: Using the Plugin
Now that your plugin is activated, you can start using it. To use the plugin, you simply need to type a command or question into the ChatGPT interface related to the plugin’s functionality.
For example, if you want to use the Zillow plugin to find homes for sale in a particular area, you might type: “Show me homes for sale in Austin, Texas.” ChatGPT, utilizing the Zillow plugin, will provide you with a list of homes for sale in that area.
You don’t need to select the plugin that you want ChatGPT to use, even if you have multiple plugins. ChatGPT will automatically select the most appropriate one to use, and let you know which one it has selected.
[convertkit form=5102847]
FAQS – ChatGPT Plugins
What are ChatGPT plugins?
ChatGPT plugins are additional features or applications that enhance the functionality of the ChatGPT tool, enabling it to perform specialized tasks.
Do I have to pay extra to use plugins?
No, plugins are included with your paid ChatGPT subscription. However, they’re not available for free users.
How do I access the plugins?
Once you’ve logged into your ChatGPT account, click on the three dots on the bottom left corner, select ‘Settings’, and then ‘Beta Features’. From there, you can toggle on the plugins. (refer to the guide above)
How do I add a plugin to my ChatGPT interface?
After enabling the plugins in settings, you can add specific plugins by going to the ‘Plugin’ section under the GPT-4 menu. Select ‘Plugin store’, then scroll through the list of available plugins, click on the one you want, and hit ‘Activate’ or ‘Add’.
Can I use multiple plugins at once?
To use a plugin, type a command or question into the ChatGPT interface that’s related to the plugin’s functionality. For example, if you’ve activated a real estate plugin, you might type “Show me homes for sale in Austin, Texas.”
How do I know which plugin ChatGPT is using?
If you find a certain plugin not useful, you can simply deactivate it from your ChatGPT interface. You can do this by going to the ‘Plugins’ section under the GPT-4 menu, finding the plugin you want to deactivate, and clicking ‘Deactivate’.
How often are new plugins added?
OpenAI frequently updates the Plugin store with new plugins to improve the functionality and versatility of ChatGPT. Regularly check the Plugin store for updates.